The Building

Building pre-intervention

Building pre-intervention: Downies Cottage_before.jpg

Building post-intervention

Building post-intervention: Downies Cottage_after.jpg

Downie's Cottage

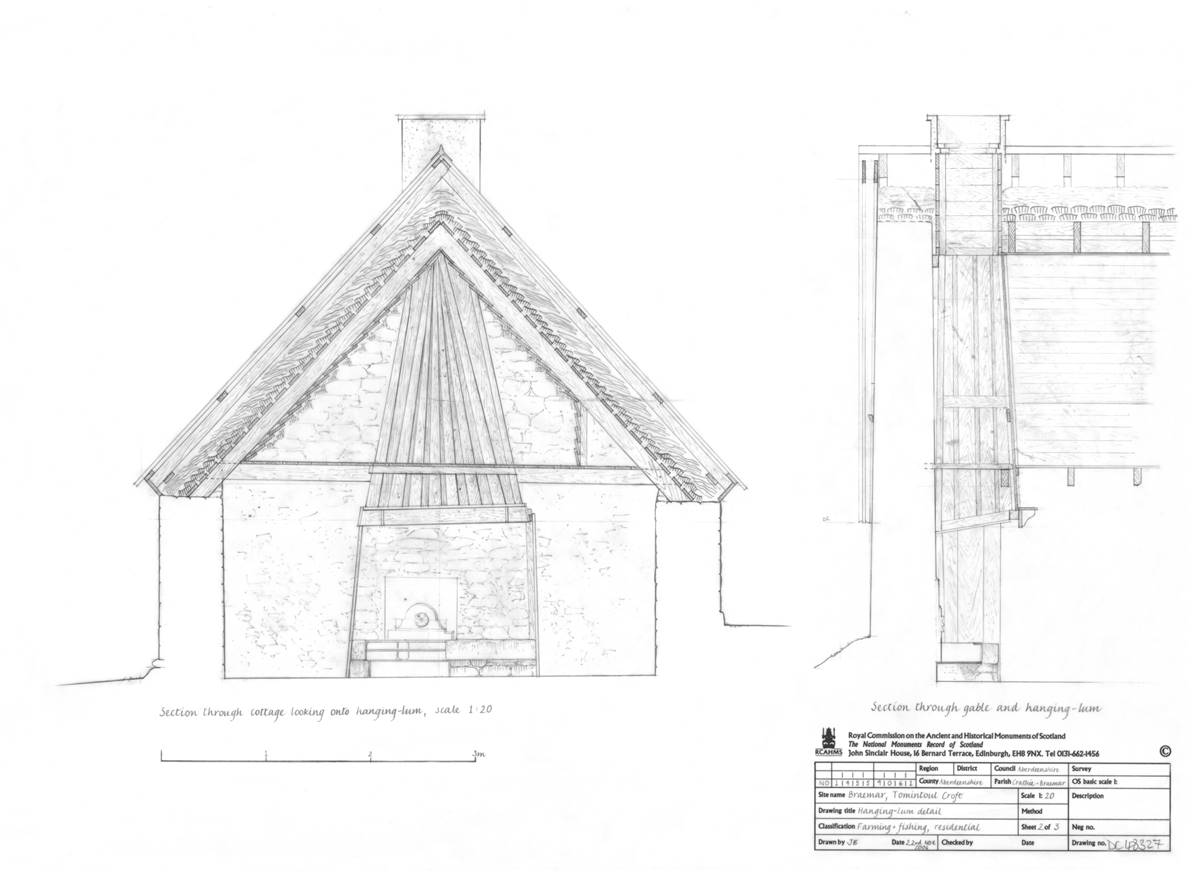
Downey's Cottage is an exceptionally rare and important survival of the open hearth tradition of vernacular building in the North East of Scotland in early to mid 19th century. This simple 3-bay cottage is remarkable for its largely intact interior with traditional plan arrangement. The croft house is rectangular in plan, constructed of a single storey in mortared rubble stone. Both gables are masonry, one with an internal flue. The accommodation consists of two principal rooms on the ground floor, separated by a stair and smaller bedroom in the middle. The narrow stair leads to two upstairs attic sleeping areas. Ceilings on the ground floor are low, and the footprint of the building is by any standard, very small. Heating would have been provided by the two hearths, one on each gable. The roof was originally a heather thatch, presently covered in corrugated iron before works started, which has ensured its survival. A thatch roof in Scotland, regardless of material, has an effective lifespan of about 40 years; less in wetter areas.

More Details

The Solution

Solution pre-intervention

Solution pre-intervention: old_floor_downies_cottage_01.jpg
Solution pre-intervention: old_floor_downies_cottage_02.jpeg

Solution post-intervention

Solution post-intervention: new_floor_downies_cottage_01.jpg
Solution post-intervention: new_floor_downies_cottage_02.jpeg
Solution post-intervention: new_floor_downies_cottage_03.jpeg
Solution post-intervention: new_floor_downies_cottage_04.jpeg
Solution post-intervention: new_floor_downies_cottage_05.jpeg
Solution post-intervention: new_floor_downies_cottage_06.jpeg
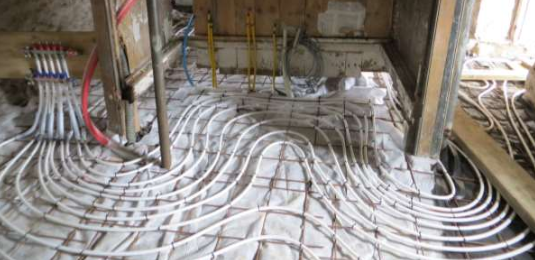
Solution post-intervention: Underfloor_Heating.png
What is the Solution?

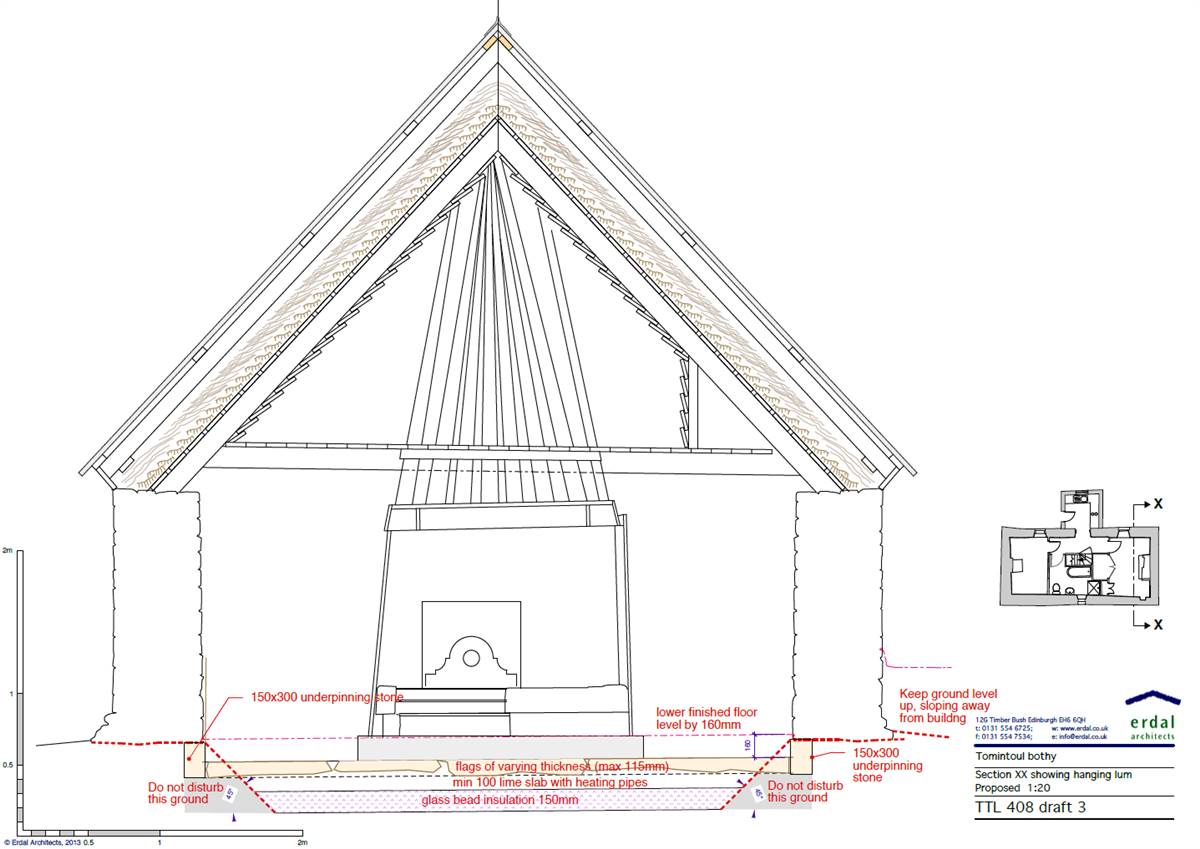
The existing flagstones were removed and the floor was excavated down to a depth of 400mm below the floor level, in order to increase the room height and to fit in the insulation. An insulated lime concrete floor -an insulation layer of aggregate (expanded glass cobbles) overlayed with a geotextile membrane to provide a clean working surface, and enclosed with a 100mm lime concrete layer- was laid in the excavated space. The flagstones were then re-layed in the onto the insulated lime concrete.

Why Does it work?

The original flagstones had all been removed and numbered to allow their replacement in identical order and these were then relayed over the lime concrete slab, giving a floor finish much like the original. Additionally, the materials chosen have the ability to absorb and emit moisture, and so create ‘breathable’ insulating floors, thus overcoming many of the disadvantages of impermeable systems.

PROS
  • These floors can be laid with or without under-floor heating.
  • The materials have the ability to absorb and emit moisture, they make ‘breathable’ insulating floors.
  • The floor finish is much like the original.
  • Improved energy performance and comfort
CONS
  • The installation of an insulating lime concrete floor involves the excavation of the ground to the required depth, then levelling and compaction of the ground before installation of the breathable membrane. This need for substantial excavation is the principal disadvantage of this system leading also to high costs.
  • Any floor finishes laid on a lime concrete floor should be permeable to retain the movement of moisture vapour through the floor.
  • Such floors need time to dry out, as does a conventional concrete floor.
Insulation material
Insulation layer of aggregate (expanded glass cobbles) and insulated lime concrete
Insulation thickness
150+100=250
Thermal conductivity
0.075 (average of the 2 insulation materials, estimated from U-Values)
Health issue
information not available
Installation Method
The removal of the existing flagstones and the excavation of the floor were done down to a depth of 400mm below the floor level. Part of this depth was required by the client to increase the room height. This was done by hand, and material was transported out in wheelbarrows. It was decided to excavate the floor in short sections and additional masonry was built into the exposed footings of the wall. An insulated lime concrete floor plate, designed for a heating loop, was laid in two layers to just below the final floor level. Level of the floor excavation was tapered up towards the walls to minimise excavation close to the wall foot. The floor consisted of an insulation layer of aggregate (expanded glass cobbles) overlayed with a geotextile membrane to provide a clean working surface, and enclosed with a 100mm lime concrete layer.
Moisture Management and Technical Compatibility
A lime concrete floor was specified for this project to allow a degree of vapour movement and dispersal from under the floor. To prevent moisture building up in the ground under the floor and then rising up the walls.
Airtightness
information not available

Before retrofit

After retrofit

Before retrofit
Floor thickness
100
After retrofit
Floor thickness
400
Before retrofit
Floor build-up
Flagstones bedded on earth [100mm]
After retrofit
Floor build-up
Original flagstones [100mm], insulated lime concrete + Underfloor heating [100mm], Geotextile membrane [~10mm], Aggregate (expanded glass cobbles) [150mm]
Before retrofit
U-value
4.5
After retrofit
U-value
0.28

Assessment

Floor type
Slab
Insulaiton position
Above the load bearing structure
Flooring maintained
Yes
Floor U-value
0.25 < U <= 0.3333
Insulation type
Natural: mineral
Circular approach
Yes
Reversibility
Yes
Investment cost
High

Location

Braemar, United Kingdom - 1500m
Climatic Zone:Cfb